
Backup and Restore
Appsmith comes with the appsmithctl command line utility. You can use the command line to interact with and manage your self-hosted instance. For example, back up and restore your Appsmith instance and database. This page provides steps to run the backup and restore commands.
Usage
appsmithctl <subcommand> <options>
Subcommands
Subcommands allow you to trigger different operations like exporting or importing databases.
| Subcommand | Description |
|---|---|
| --help | Shows available subcommands and how to use appsmithctl |
| backup | Creates a backup of the Appsmith instance |
| ex, export_db | Creates a backup of Appsmith internal database |
| --upload-to-s3 | Upload the back up files to S3 bucket (Commercial Edition only) |
| restore | Restores the Appsmith instance from a backup |
| im, import_db | Restores the Appsmith internal database |
Prerequisites
- The self-hosted instance should be up and running. If you haven't already installed Appsmith, refer to the Installation guides.
- Access to execute
docker-composeorkubectlcommands
Backup instance
You can create a backup archive of the Appsmith instance. The backup includes the database, docker.env, and Git data. Follow these steps to create a backup archive:
- Docker
- Kubernetes
Go to the directory that has the
docker-compose.ymlfile.Get your encryption details with:
docker-compose exec appsmith cat /appsmith-stacks/configuration/docker.env | grep ENCRYPTION
Keep these details handy, as you need them for restoring the Appsmith instance.
- Create a backup archive with:
docker-compose exec appsmith appsmithctl backup
The backup archive file is stored in the /appsmith-stacks/data/backup/ folder. You can access it on the host machine at ./stacks/data/backup/.
- If you can't access or have a different volume configuration, copy the archive file to your host disk with:
# Replace the appsmith-backup-DATE_AND_TIMESTAMP.tar.gz with the backup file name
docker cp appsmith:/appsmith-stacks/data/backup/appsmith-backup-DATE_AND_TIMESTAMP.tar.gz .
After running the above command, the backup archive is copied to your current directory, indicating that the backup process is completed. You can now proceed with the remaining steps of the process you were performing.
- Get the name of the Appsmith pod with (replace the
APPSMITH_NAMESPACEwith your Appsmith namespace):
kubectl get pods -n APPSMITH_NAMESPACE
- Get your encryption details using the below command (replace the
ANY_APPSMITH_POD_NAMEwith your Appsmith pod name):
kubectl exec ANY_APPSMITH_POD_NAME -- cat /appsmith-stacks/configuration/docker.env | grep ENCRYPTION
Keep these details handy, as you need them for restoring the Appsmith instance.
- Create a backup using the below command (replace the
ANY_APPSMITH_POD_NAMEwith your Appsmith pod name):
kubectl exec ANY_APPSMITH_POD_NAME appsmithctl backup
The archive file is stored in the container directory /appsmith-stacks/data/backup/.
- Copy the archive file using the below command, ensure that you replace the
ANY_APPSMITH_POD_NAMEwith your Appsmith pod name, APPSMITH_BACKUP_FILENAME with your Appsmith backup filename, and APPSMITH_NAMESPACE with your Appsmith namespace:
kubectl cp ANY_APPSMITH_POD_NAME:/appsmith-stacks/data/backup/APPSMITH_BACKUP_FILENAME -n APPSMITH_NAMESPACE GIVE_NAME_FOR_COPIED_BACKUP_FILE
After running the above command, the backup archive is copied to your current directory, indicating that the backup process is completed. You can now proceed with the remaining steps of the process you were performing.
Schedule automatic backups
Docker
Follow these steps to schedule backups only for Docker Appsmith installation:
- Go to the directory where the
docker.envfile is located. - Open the
docker.envfile and set the environment variable as shown below:
# Add a 5-value cron expression
APPSMITH_BACKUP_CRON_EXPRESSION="ADD_5_VALUE_CRON_EXPRESSION"
Examples
- To schedule a backup at 12:00 noon on Sunday:
APPSMITH_BACKUP_CRON_EXPRESSION="0 12 * * SUN"
- To schedule a backup daily at Midnight:
APPSMITH_BACKUP_CRON_EXPRESSION="0 0 * * *"
For more information about creating the Cron expressions, see Cron Schedule Expression Editor.
Sync backup to S3 bucket
Follow these steps to sync backups with an S3 bucket for your installation type:
- Docker
- Kubernetes
- Go to the directory where the
docker.envfile is located. - Open the
docker.envfile and add the below entries:
APPSMITH_BACKUP_S3_ACCESS_KEY=AWS_ACCESS_KEY
APPSMITH_BACKUP_S3_SECRET_KEY=AWS_SECRET_KEY
APPSMITH_BACKUP_S3_BUCKET_NAME=BUCKET_NAME
APPSMITH_BACKUP_S3_REGION=AWS_BUCKET_REGION
- Sync your backups to the S3 bucket with:
docker-compose exec appsmithctl backup --upload-to-s3
After configuration, the restore command lists local and S3 bucket backups.
Set the Amazon S3 bucket:
- Using the command:
helm upgrade \
--set applicationConfig.APPSMITH_BACKUP_S3_ACCESS_KEY=AWS_ACCESS_KEY  \
--set applicationConfig.APPSMITH_BACKUP_S3_SECRET_KEY=<AWS_SECRET_KEY \
--set applicationConfig.APPSMITH_BACKUP_S3_BUCKET_NAME=BUCKET_NAME  \
--set applicationConfig.APPSMITH_BACKUP_S3_REGION=AWS_BUCKET_REGION \
  appsmith appsmith/appsmith
Or using
values.yamlfile:a. Update the parameter values in the
values.yamlfile under theapplicationConfigsection:applicationConfig:
APPSMITH_BACKUP_S3_ACCESS_KEY=AWS_ACCESS_KEY
APPSMITH_BACKUP_S3_SECRET_KEY=AWS_SECRET_KEY
APPSMITH_BACKUP_S3_BUCKET_NAME=BUCKET_NAME
APPSMITH_BACKUP_S3_REGION=AWS_BUCKET_REGIONb. Update the values:
helm upgrade appsmith appsmith-ee/appsmith -f values.yaml
Get the name of the Appsmith pod with:
kubectl get pods
- Sync your backups to the S3 bucket with:
# Replace `ANY_APPSMITH_POD_NAME` with the pod name
kubectl exec ANY_APPSMITH_POD_NAME appsmithctl backup --upload-to-s3
After configuration, the restore command lists local and S3 bucket backups.
Backup database
Follow these steps to back up your Appsmith internal database:
Ensure that the name of the backup archive (appsmith-data.archive) isn't changed.
- Docker
- Kubernetes
Go to the directory that has the
docker-compose.ymlfile.Get your encryption details with:
docker-compose exec appsmith cat /appsmith-stacks/configuration/docker.env | grep ENCRYPTION
Keep these details handy, as you need them for restoring the Appsmith database.
- Create a backup archive with:
docker-compose exec appsmith appsmithctl export_db
The backup archive file is stored in the /appsmith-stacks/data/backup/ folder. You can access it on the host machine at ./stacks/data/backup/.
- If you can't access or have a different volume configuration, copy the archive file to your host disk with:
docker cp appsmith:/appsmith-stacks/data/backup/appsmith-data.archive .
This command copies the backup archive in your current directory.
- To recreate the same environment elsewhere, copy the
docker.envfile with:
docker cp appsmith:/appsmith-stacks/configuration/docker.env .
This command copies the docker.env file in your current directory.
- Get the name of the Appsmith pod with:
kubectl get pods
- Get your encryption details with:
# Replace `ANY_APPSMITH_POD_NAME` with the pod name
kubectl exec ANY_APPSMITH_POD_NAME -- cat /appsmith-stacks/configuration/docker.env | grep ENCRYPTION
Keep these details handy, as you need them for restoring the Appsmith database.
- Create a database backup with:
# Replace `ANY_APPSMITH_POD_NAME` with the pod name
kubectl exec ANY_APPSMITH_POD_NAME appsmithctl export_db
The archive file is stored in the container directory /appsmith-stacks/data/backup/.
- Copy the archive file with:
# Replace `ANY_APPSMITH_POD_NAME` with the pod name
kubectl cp ANY_APPSMITH_POD_NAME:/appsmith-stacks/data/backup/appsmith-data.archive appsmith-data.archive
Restore instance
Follow these steps to restore your Appsmith instance from a backup archive:
- Docker
- Kubernetes
- Restore your Appsmith instance with:
docker-compose exec appsmith appsmithctl restore
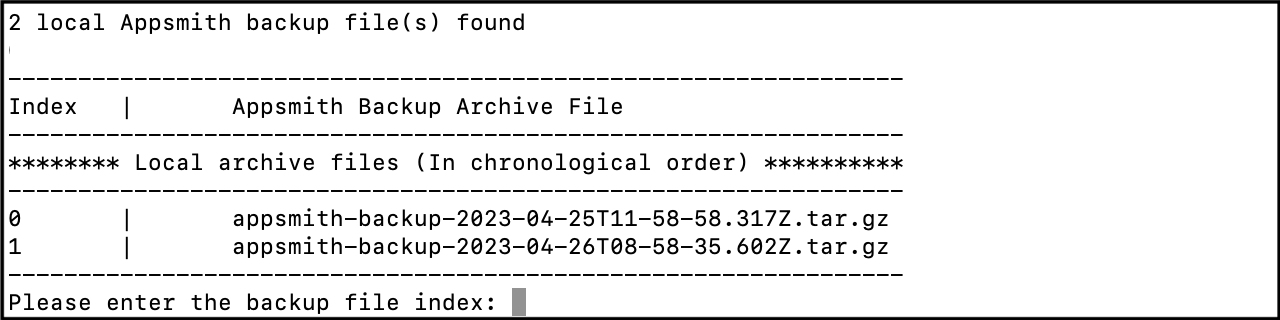
The command lists backup archives in the folder, with the latest backup at the bottom.
- Select the backup archive from the given list of backup archives to restore.
If you restore an older version of Appsmith, a warning message may appear. Update the docker-compose.yml file with the Appsmith image you wish to restore.
- You can either use the existing encryption or create new values for:
- APPSMITH_ENCRYPTION_PASSWORD
- APPSMITH_ENCRYPTION_SALT

- Get the name of the Appsmith pod with:
kubectl get pods
- Copy the archive file to the pod with:
# Replace `ANY_APPSMITH_POD_NAME` with the pod name
kubectl cp appsmith-backup-TIMESTAMP.tar.gz ANY_APPSMITH_POD_NAME:/appsmith-stacks/data/backup/
Go to the
/appsmith-stacks/configuration/folderOpen the
docker.envfile and update the below parameters:
# The one you generated and stored while creating a backup
APPSMITH_ENCRYPTION_PASSWORD=APPSMITH_ENCRYPTION_PASSWORD
APPSMITH_ENCRYPTION_SALT=APPSMITH_ENCRYPTION_SALT
- Restore the backup with:
# Replace `ANY_APPSMITH_POD_NAME` with the pod name
kubectl exec ANY_APPSMITH_POD_NAME appsmithctl restore
Restart the Appsmith pods:
a. When autoscaling is turned off, or you are using a Community Edition with:
kubectl rollout restart statefulset appsmithb. When autoscaling is turned on with:
kubectl rollout restart deployment appsmith
Restore database
Follow these steps to restore the Appsmith internal database:
- Docker
- Kubernetes
- Copy the archive file into the container with:
docker cp ./appsmith-data.archive appsmith:/appsmith-stacks/data/restore/
- Import data from the backup archive file with:
docker-compose exec appsmith appsmithctl import_db
- Copy the
docker.envfile with:
# Add the path for the docker.env file if not present in the installation folder
docker cp ./docker.env appsmith:/appsmith-stacks/configuration/
- Restart the Appsmith server with:
docker-compose exec appsmith supervisorctl restart backend
- Get the name of the Appsmith pod with:
kubectl get pods
- Copy the archive file into the container with:
# Replace `ANY_APPSMITH_POD_NAME` with the pod name
kubectl cp ./appsmith-data.archive ANY_APPSMITH_POD_NAME:/appsmith-stacks/data/restore/
Go to the
/appsmith-stacks/configuration/folderOpen the
docker.envfile and update the below parameters:
# The one you generated and stored while creating a backup
APPSMITH_ENCRYPTION_PASSWORD=APPSMITH_ENCRYPTION_PASSWORD
APPSMITH_ENCRYPTION_SALT=APPSMITH_ENCRYPTION_SALT
- Import data from the archive file with:
# Replace `ANY_APPSMITH_POD_NAME` with the pod name
kubectl exec ANY_APPSMITH_POD_NAME appsmithctl import_db
Restart the Appsmith pods:
a. When autoscaling is turned off, or you are using a Community Edition with:
kubectl rollout restart statefulset appsmithb. When autoscaling is turned on with:
kubectl rollout restart deployment appsmith
Troubleshooting
If you face issues, contact support@appsmith.com.